Integrate Snowflake#
Collecting various types of data is essential for anyone aiming to understand user behaviors. However, for data-intensive applications, scalability and real-time processing are crucial.
Integrating Django with Snowflake offers a scalable solution for handling large datasets. With django-snowflake,
you can leverage Django`s ORM capabilities while using Snowflake`s cloud-based data warehousing, making it easier to capture and analyze user data.
👉 Django & Snowflake Integration - Free Coding Sample
👉 Get Support via email and Discord
This guide covers setting up Django with django-snowflake, building a REST API with Django REST Framework (DRF) to aggregate analytics data.
👉 New to App-Generator? Sign IN with GitHub or Generate Web Apps in no time (free service).
Project Setup#
Download the project at this branch:
git clone -b base --single-branch https://github.com/app-generator/docs-django-snowflake.git
After that, create a virtual environment in the newly cloned directory:
python3 -m venv venv
source venv/bin/activate
Then, install the dependencies.
pip install -r requirements.txt
With this done, we can set up Snowflake and create a model.
Connecting Snowflake#
For applications handling large amounts of analytics data, traditional relational databases may struggle. Snowflake adds scalable analytics, allowing for quick insights and complex queries without impacting application performance.
Key benefits of this setup include:
Elastic Scalability: Snowflake`s infrastructure supports on-demand scaling, ideal for applications with rapidly growing data needs.
Data Analytics Capabilities: Snowflake`s optimized performance for BI and analytics allows complex queries that go beyond Django ORM`s native capabilities.
Cost Efficiency: Snowflake`s pricing model is based on storage and compute usage, helping you manage costs.
Setting Up Snowflake#
Create a Snowflake Account: Sign up at Snowflake.
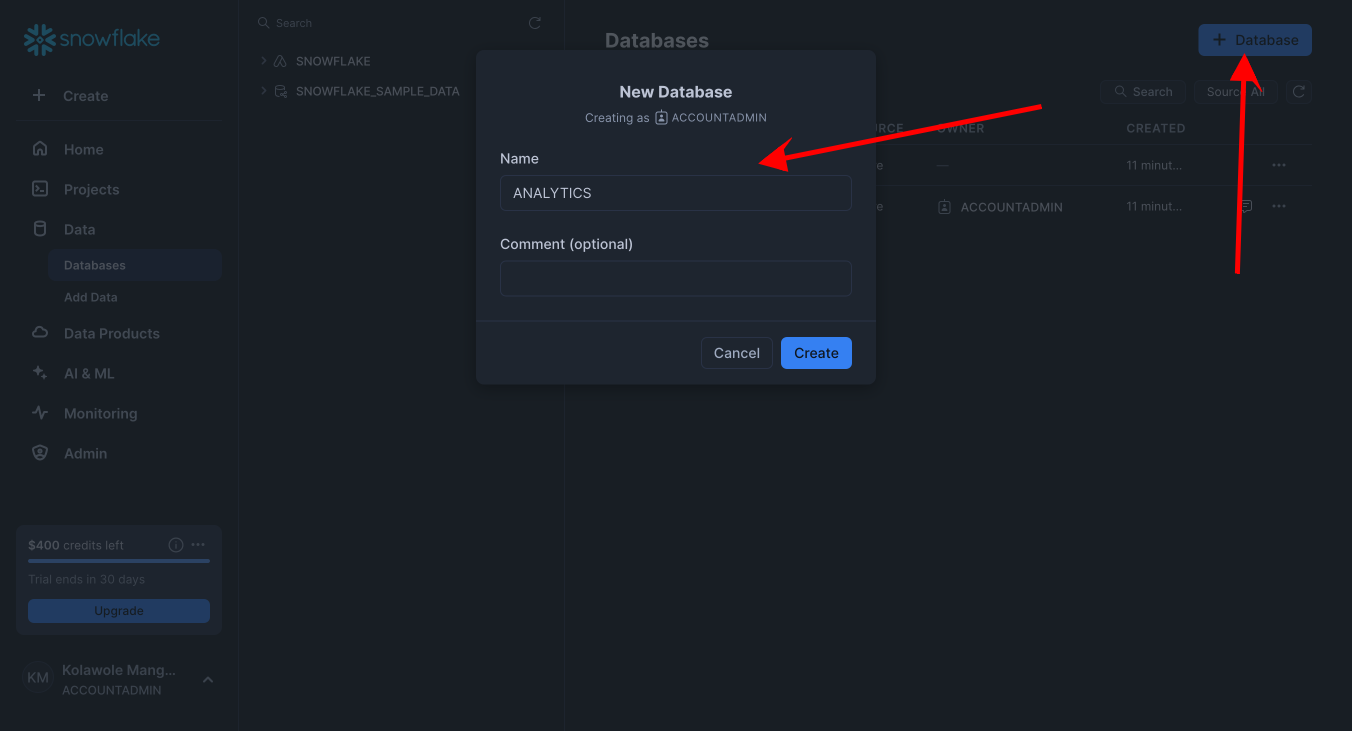
Create a Database: Configure a database and schema in Snowflake where analytics data will be stored.

In a file called .env, enter the required information for the Snowflake connection.
# .env

SNOWFLAKE_USER="your_username"
SNOWFLAKE_PASSWORD="your_password"
SNOWFLAKE_ACCOUNT="your_account_identifier"
SNOWFLAKE_WAREHOUSE="your_warehouse"
SNOWFLAKE_DATABASE="your_database"
SNOWFLAKE_SCHEMA="your_schema"
Once this is done, install django-snowflake. Using django-snowflake allows Django to integrate naturally with Snowflake by treating it like any other database backend.
This setup simplifies managing database connections and queries, enabling you to use Django`s ORM directly with Snowflake.
Update your Django settings.py to add Snowflake as the database:
# core/settings.py

DATABASES = {
    'default': {
        'ENGINE': 'django_snowflake',
        'USER': os.getenv('SNOWFLAKE_USER'),
        'PASSWORD': os.getenv('SNOWFLAKE_PASSWORD'),
        'ACCOUNT': os.getenv('SNOWFLAKE_ACCOUNT'),
        'WAREHOUSE': os.getenv('SNOWFLAKE_WAREHOUSE'),
        'DATABASE': os.getenv('SNOWFLAKE_DATABASE'),
        'SCHEMA': os.getenv('SNOWFLAKE_SCHEMA'),
    }
}
With the database configured, run the following command to check the setup.
python manage.py migrate
Creating an API in Django with DRF to Aggregate Data#
Create a new application called analytics.
python manage.py startapp analytics
Make sure to register the app in the INSTALLED_APPS section of core/settings.py.
# core/settings.py

INSTALLED_APPS = [
    ...

    # APPS
    "home",
    "analytics",
]
We can now create a REST API endpoint to collect and insert user analytics data directly into Snowflake using DRF.
Define the Serializer#
Create a serializer to validate incoming JSON data.
# analytics/serializers.py

from rest_framework import serializers

class UserAnalyticsSerializer(serializers.Serializer):
    user_id = serializers.CharField(max_length=255)
    action = serializers.CharField(max_length=255)
Define the Data Model#
Define a model that represents the analytics data we`ll be storing in Snowflake.
# analytics/models.py

from django.db import models

class UserAnalytics(models.Model):
    user_id = models.CharField(max_length=255)
    action = models.CharField(max_length=255)
    timestamp = models.DateTimeField(auto_now_add=True)
Create the API View#
Using DRF`s APIView, create an endpoint to handle incoming POST requests for user actions.
# analytics/views.py

from rest_framework.views import APIView
from rest_framework.response import Response
from rest_framework import status
from .serializers import UserAnalyticsSerializer
from .models import UserAnalytics

class RecordUserAction(APIView):
    def post(self, request):
        serializer = UserAnalyticsSerializer(data=request.data)
        if serializer.is_valid():
            # Save data to the Snowflake table
            UserAnalytics.objects.create(
                user_id=serializer.validated_data['user_id'],
                action=serializer.validated_data['action']
            )
            return Response({'status': 'success', 'message': 'Data recorded'}, status=status.HTTP_201_CREATED)

        return Response(serializer.errors, status=status.HTTP_400_BAD_REQUEST)
Configure URLs#
Add a URL pattern in home/urls.py to route requests to this API view.
from django.urls import path
from . import views
from analytics.views import RecordUserAction

urlpatterns = [
    path("", views.index, name="index"),
    path('record/', RecordUserAction.as_view(), name='record_user_action')
]
Now that our API endpoint is set up, you can use an API client to test the endpoint. We`ll use a script to send sample data to the endpoint, simulating user actions and storing them in Snowflake.
Script to Insert Data#
Here`s a Python script that inserts 1,000 entries of user analytics data into the Snowflake table via our Django API:
# analytics/load_data.py

import requests
import random
import string

def generate_user_id():
    return ''.join(random.choices(string.ascii_uppercase + string.digits, k=8))

def generate_action():
    actions = ['login', 'view', 'click', 'purchase', 'logout']
    return random.choice(actions)

url = 'http://localhost:8000/record/'

# Insert 1000 entries
for _ in range(1000):
    data = {
        'user_id': generate_user_id(),
        'action': generate_action()
    }
    response = requests.post(url, json=data)
    if response.status_code == 201:
        print("Data recorded successfully")
    else:
        print("Failed to record data", response.json())
Conclusion#
Using django-snowflake simplifies integrating Django with Snowflake, allowing you to treat Snowflake like any other database within Django.
With DRF, you can create a maintainable and scalable API, while Snowflake`s analytics capabilities handle large datasets efficiently.
To learn more about django-snowflake, refer to the docs.
Links#
👉 New to App-Generator? Join our 10k+ Community using GitHub One-Click SignIN.
👉 Download products and start fast a new project
👉 Bootstrap your startUp, MVP or Legacy project with a custom development sprint
